Monday, March 31, 2014

A GOOD Morning Mirror...

Good Morning Everyone! Lynne here today to share my latest re-purposed item with you... it's a colorful textured mirror to match my crackle-painted clock from my last post.  This mirror is going to grace the wall of my new creative space adding a great pop of color and reminding me that I LIVE TO CREATE!

I started with an inexpensive 8"x8" mirror from Ikea...

to which I added some texture using a stencil and modelling paste.  Because I was using the black framed mirror, after the modelling paste had dried I gave it a coat of gesso to make it all white, then I added the color. 

To achieve this lovely background I used two products: first my Tim Holtz distress stain dauber in Broken China, which I rubbed all over the white frame making sure to leave some white to peek through; 

then my Tattered Angels glimmer glaze in Emerald Cove and Blue Oasis, which I used as an accent color to enhance the blues and greens, this was dabbed on and rubbed in using my fingers.

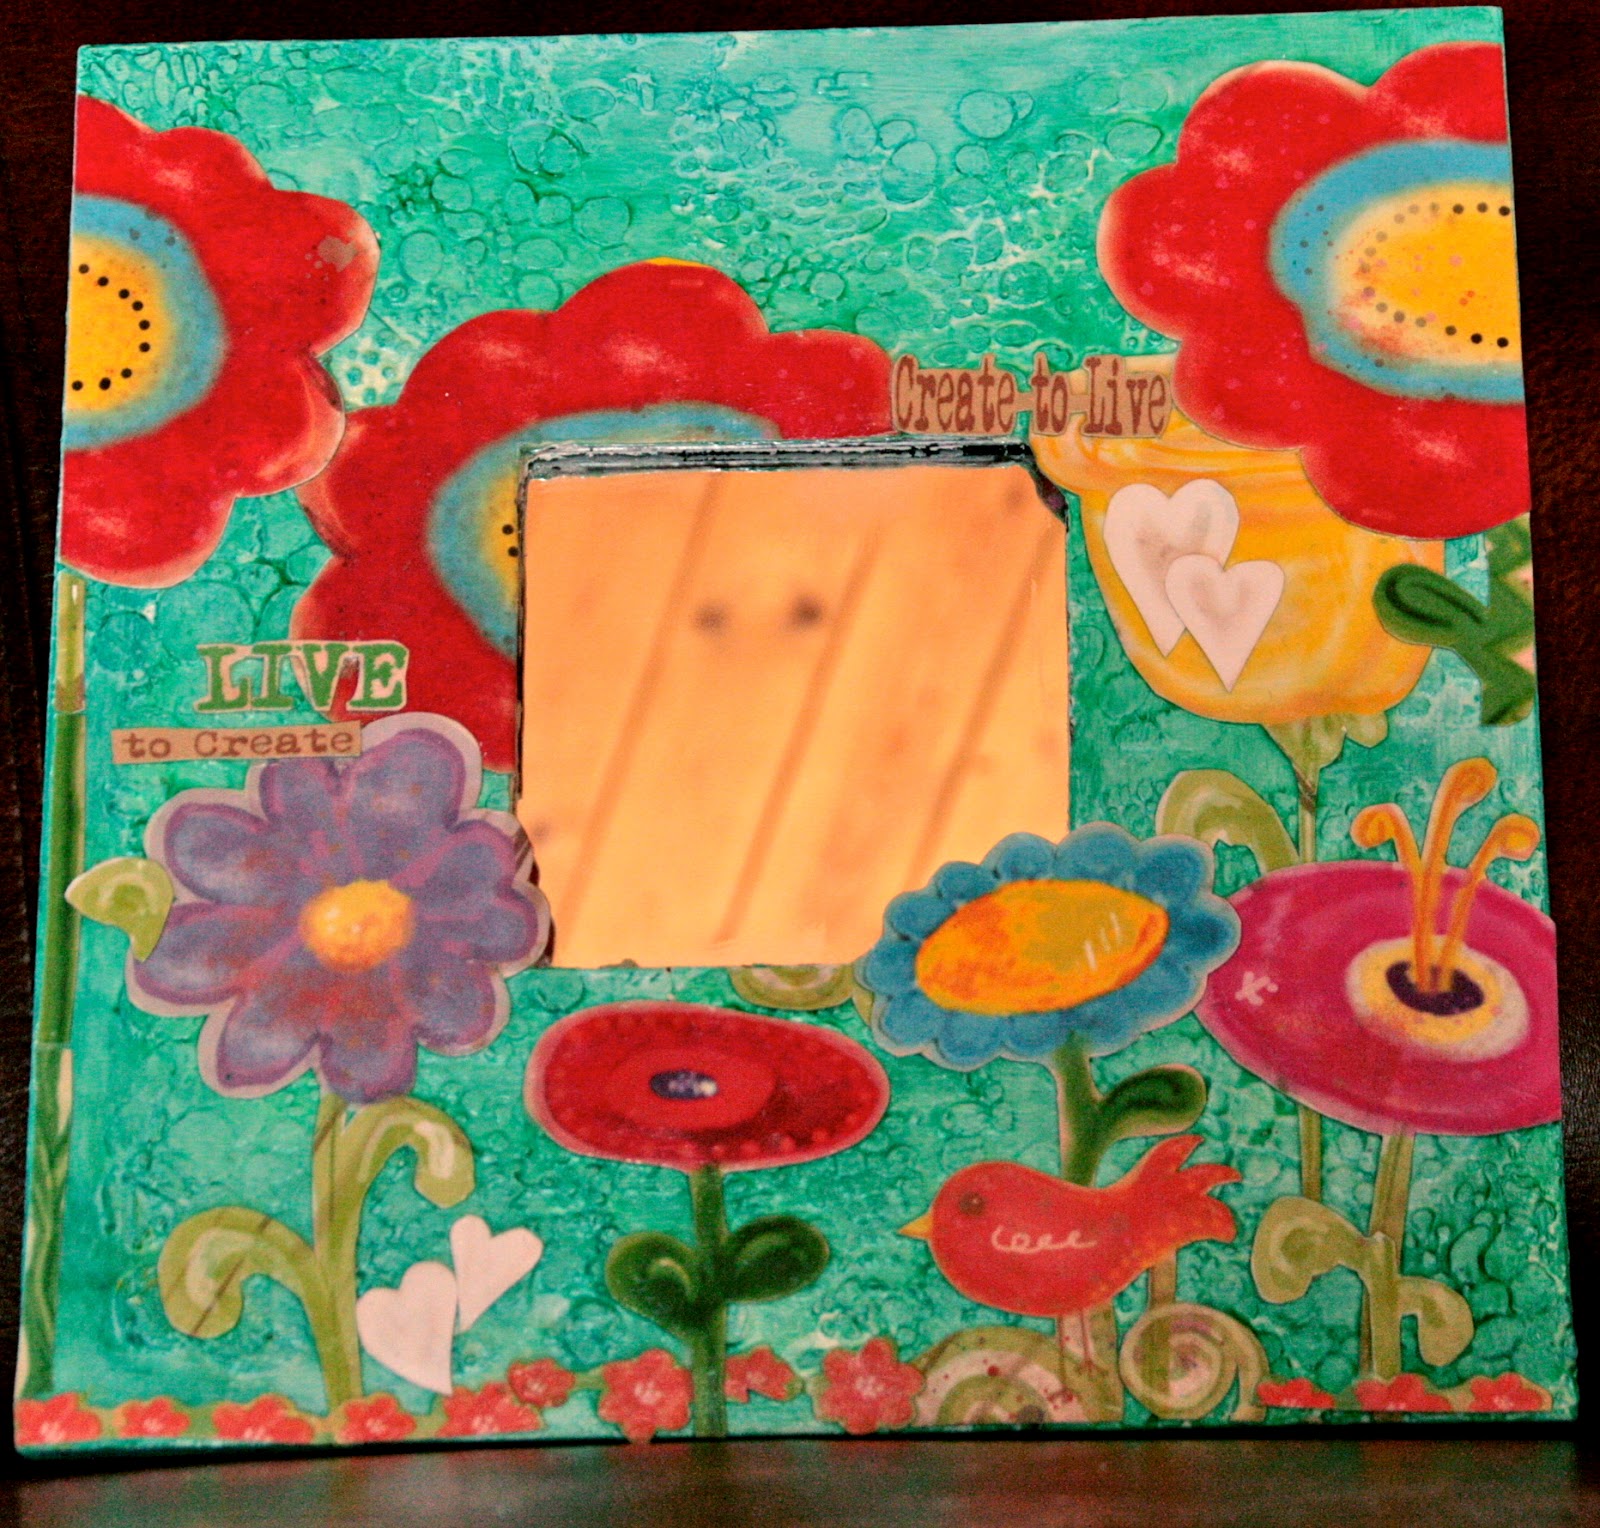
Mod Podge and Susan's Live In Color paper line completed my mirror, as I happily cut and layered until I was done.  I am very happy with how this project turned out, and one of the things I love the most is that when I look into this mirror my face is framed by all those colorful flowers and that makes me happy!

Thanks for stopping by today to see what I am up to, and please do leave a comment if you like what you see!
Cheers (smile)
Lynne Mizera
Design Team Member

Products used on this project:
Susan K. Weckesser Live in Color cardstock
Ikea wooden frame (8x8)
The Crafter's Workshop Mini Cell Theory stencil
Golden modelling paste
Ranger Distress Stain - Broken China
Tattered Angels Glimmer Glaze - Blue Oasis & Emerald Cove
Plaid Mod Podge
Daler & Rowney Acrylic Gesso


Saturday, March 29, 2014

If we have blooming spring....


Hello~!
DT MIYAKE here.


2014 Sochi Winter Paralympics closing ceremony (2014.03.17)
Did you see it?

2018 Olympic Games will be held in Pyeongchang, Korea.

So, When the closing ceremony,
 There was Korea traditional music, traditional pattern, traditional pictures performances. 


Oh so beautiful! 

Today I would like to introduce you to Korea Traditional Art. 

Spring has come. 
Flowers bloomed.
Warm wind blows.
Flower Rain falls from the sky.


Susan K. Weckesser Paper


Susan K. Weckesser Stencil


Using Gelatos


This is Korea traditional pattern. 
'Danchung' is called.


This is 'Blooming Spring' Korean Calligraphy.
'Bom' is called.


Flowers bloomed. Love this!
  

Flower Rain falls from the sky


Friday, March 28, 2014

Let your spirit shine through

Hello crafty friends! Einat Kessler here with a new art journal page to inspire you. The reason I love art journaling is because there are no limits...there is no photo to dictate the mood of the page, or the colors and embellishments. In art journaling you can pour your heart out on the paper...
This page is all about shining through the darkness.


I started with coloring my page with dark color sprays. Then I added another layer of dark color with a dark brown Gelatos. Finally to complete the dark background I added black stamping.


I created tares in the paper and glued it to the next page in the art journal. I mad sure I didn't apply glue near the tears so I can later tuck things under them.


I cut different sizes of colorful flowers from SKW patterned paper and tucked them under the tears. Then I added my journaling with a white pen. I also added doodling to enhance the contrast of the happy flowers and the journaling compared to the dark background.


Don't be scared to pour your heart on a paper it'll free your soul!

"Just living is not enough... one must have sunshine, freedom, and a little flower."
Hans Christian Andersen

Have fun creating!
Einat

Thursday, March 27, 2014

Flowerpot Mixed Media Layout

Hello friends!  Happy Thursday.  It's Lee-Anne here and today I am sharing a mixed media layout with Susan's stencils and papers. Since it is now Spring here in Canada, I can't help but think about gardening and all the flowers that are popping up such as tulips and daffodils.

My definition of mixed media is lots of layers using paints, inks, stencils, sprays, stamps, flowers, fibers, papers to create texture and dimension.  For my layout below, I used lots of different mediums such as paint, sprays, ink, modelling paste and glitter.


For this layout,  I created with Susan K. Weckesser's Live In Color Collection.  First I fussy cut some flowers and the title "Live In Full Color" as well as drew freehand and cut a flower pot.

 I then ran the flowerpot through my embossing machine with a weaved basket embossing folder to give it more texture and dimension then inked it with some distress ink.

Next I took some modelling paste and a brick stencil and added it the paper as shown. I felt that it  needed some color so I used a paint dabber in a beige color and dabbed the bricks.  When the brick background was completely dry,  I added some paint splats in red and yellow with my acrylic paint dabbers.

I adhered the stencilled paper to the kraft background and then added my flowers and flowerpot, which I gave more depth by adding some pop dots.  I thought the flowers needed something so I added some Liquid Glass and some yellow Stickles to the center of the red flower and when they were dry, I outlined with a fine black pen.  Finally I used Susan's stencil and added some "grass" with a green paint dabber and and around the top right and bottom left with a white paint dabber.

Here are some more closeups


I am going to put this in a 12X12 scrapbook frame and add it to my studio.  I hope I have inspired you to create.  Have a wonderful day!

Lee-Anne

Wednesday, March 26, 2014

Over the Deep Blue Sea with Susan K. Weckesser Inc. & Ranger Ink

photo (26)

“”””"””"”To draw, you must close your eyes and sing”

                                                                                               -Pablo Picassophoto (12)

Maybe it is the children’s writer in me…. I am not sure, but when I create I LOVE to have a story or a theme. The moment a drop of paint hits the canvas or a line of ink hits my paper,  my mind starts to envision a story…a magical place and the words start to whirls around my head. I guess you can say, it is “my happy place”.photo (5)

So, yesterday I sat down with some paper, one of my Susan K. Weckesser Inc. stamps: Sail Away, Dyan Reaveley’s Dylusions Ink , Tim Holtz Distress Markers & Distress Crackle Paint &  Perfect Pearls from Ranger Ink & a white crayon from Faber Castell , and I let the story unfold.

photo (13)

After drawing on some waves with the white crayon, I had some colourful fun with some of Dyan Reaveley’s awesome Dylusions. It made my ocean look fab! I stamped my Sail Away stamp on a piece of vintage book paper. I then glued it onto my page and used Distress markers to color it up. I sealed everything up with some fixative.

Sail Away 1Using Tim Holtz’s Distress Crackle Paint I coated my stamp image and dabbed little areas around the boat. I used the heat gun on the boat but didn't totally dry it because I wanted to add more layers to created a foamy water illusion. I used my fingers and took small pinches of Perfect Pearls and scattered around the boat. I then used the heat gun again allowed the crackle to bubbled to created a watery look.photo (23)


photo (16)

I always love doodling! So, when I was done with inks & colour, I grabbed a black pen and had some final fun.

photo (24)

I wanted to share what my awesome friend Eileen Hull has set off to do today. I think it is SO cool! CHECK IT OUT!

Eileen Hull Designspaper-trail-east-coast-promo-graphicGASS-1-3

Yup…she has gotten herself a vintage trailer and she is going on a crafty tour! SWEET! Check out Eileen’s blog for all the detail’s and if you live in those areas be sure to go out and support her because she truly is amazing!

photo (17)

photo (19)

Well, Munchie and I have mischief to get into and messes to clean. (She’s good at making those!)

Have a SUPER AMAZING day and be sure to take a little time to create your own little story!

hugs,

Susan xo

Quick and Easy Cards for any occasion

Hello everybody!

Emmy here today with a few colorful cards to share. They are very easy to create and all you need is Susan K. Weckesser Whimsical Papers, colorful cardstock, white embossing powder and Unity Stamps "abc.123.washi" stamp set.


To create these cards I used the Live in Color Tags whimsical paper and blue and pink cardstock. Using edge punches and 3d tape, I added a lot of layers to my design.


I fussy cut the sentiment from its frame, layered it on a cardstock and adhere it to its original base with 3d tape. Then I added a layered of punched cardstock under it.


To give extra dimension to my projects I stamped the alphabet washi tape from the Unity Stamps "abc.123.washi" stamp set with VersaMark ink pad and heat embossed it with white embossing powder.


I added a colorful banner, silver glitter glue and rhinestones to finish off my design.

I hope I managed to inspire you today!

I can't wait to see your creations with Susan's amazing products!

Emmy


ShareThis2

BrendaPInnickColorCafe